Getting started with Unity
Unity is a cross platform environment for developing games, apps and experiences like augmented and virtual reality. Getting started with unity is too simple because of its simplified user interface. In this article, we will see how to install unity and we will also create our first unity application.
Unity is basically a game engine that allows you to develop 3D and 2D games which can be deployed to multiple platforms like windows, android and iOS. Currently unity supports twenty-five platforms and the number may increase in future. You can find all the supported platforms over here.
Download Unity
Unity editor is supported for windows and mac operations systems. You can download latest version of unity installer from below given link.
Download Unity: https://unity3d.com/get-unity/download
Currently unity provides following editions:
- Unity Personal: Its free to use and possesses all core features.
- Unity Plus
- Unity Pro
- Unity for Enterprise
You can find the details, price and terms to use these editions on below given link.
Store Unity: https://store.unity.com/
Older versions of unity can be found over below given link.
Unity Archive: https://unity3d.com/get-unity/download/archive
Install and activate unity
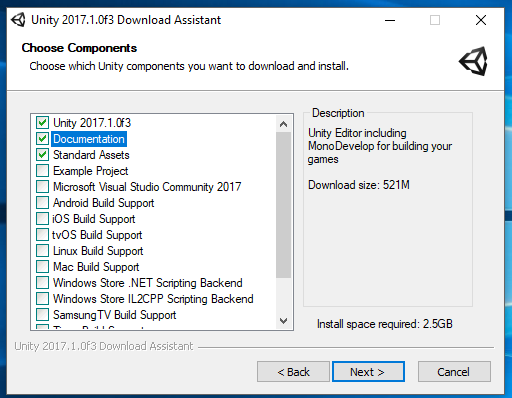
Install the unity using downloaded installer mentioned in above section. You will see below given window during the installation. By default, unity editor, documentation and standard assets will be selected. Select other components for your requirement like if you want to deploy your game for android platform then select Android Build Support. It also allows you to install Microsoft visual studio community edition IDE for editing and debugging the codes behind the scene.
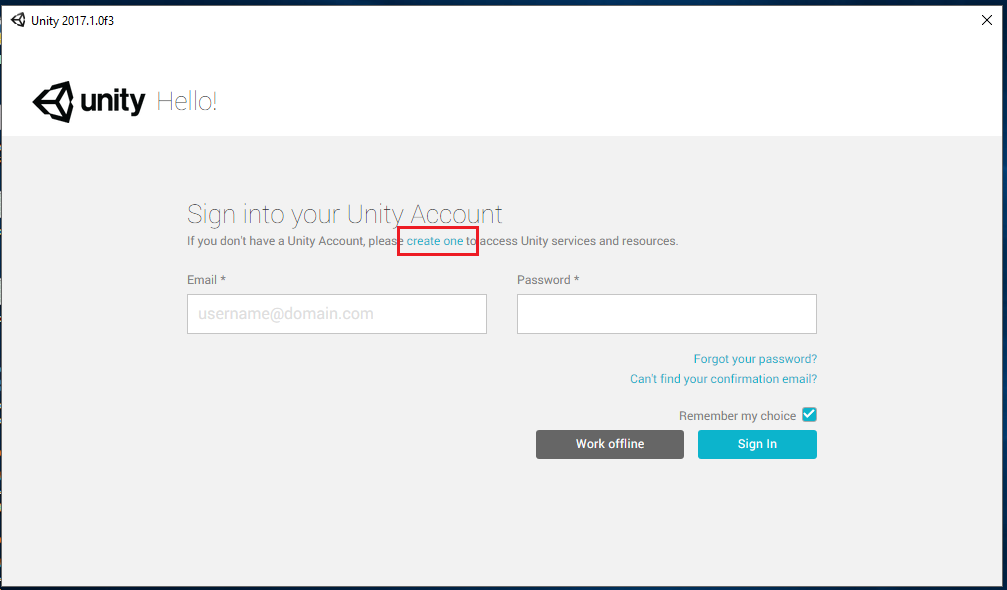
Once the unity will be installed, launch the application. It will ask you to login into your unity account. Unity account is essential for managing unity license and accessing the unity resource and services. Click on “create one” link to create a unity account.
Once the account will be created, login with your credentials. In the next page, it will ask you to opt for license activation. If you are using unity pro then provide the product key otherwise select Unity Personal Edition. Make sure that you are connected with internet, the license will have updated for your account.
You can also work offline by clicking on Work Offline button.
Create first application – Getting Started in Unity
Once you will be logged in, create a new project by clicking on New button. All the local disk project will be listed in project tab default.

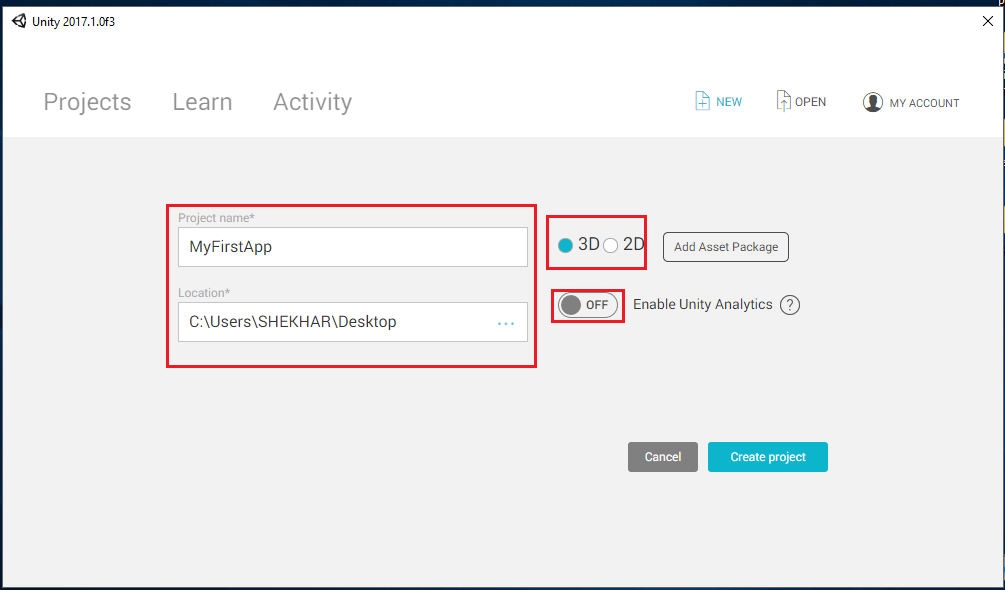
After clicking New button, Project description page will come. Write the project name, location and select whether the application will be 2D or 3D. You can also enable or disable unity analytics. Once done, click on Create Project button.
Learning the Unity Editor Interface
Once the project will be created, it will open in unity editor. By, default unity editor will look like below given image.
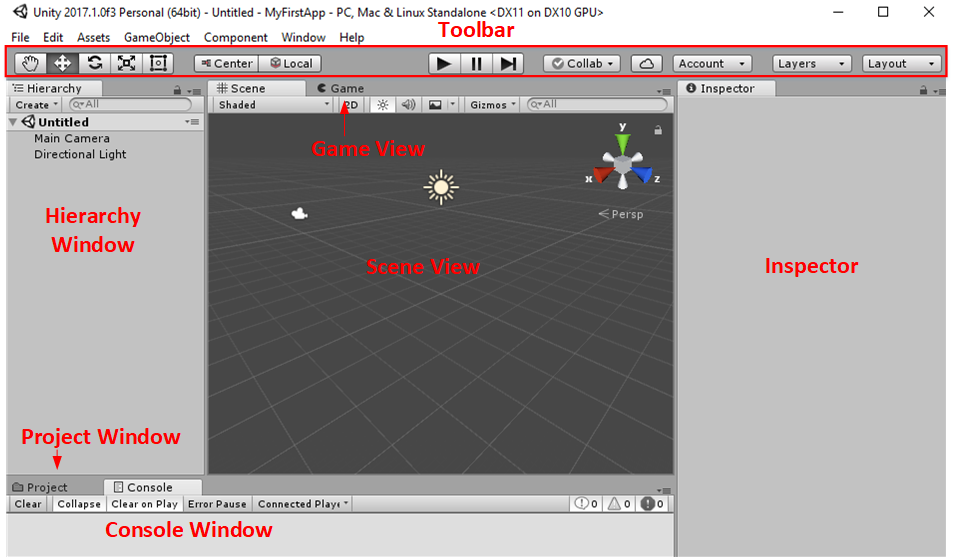
This is the default layout of unity editor. You can also change and save any custom layout (Window -> Layouts).
By default, you will see following tabs in unity editor:
- Project: All the assets will reside in this section.

- Console: You can see console output in this window. This is helpful for debugging the application.
- Hierarchy: This is the scene hierarchy. Add all the items for the scene here.
- Scene: This is editor for user interface of the application. All the items from the hierarchy will be displayed here. You can change the property of the items here like position, rotation and size.
- Game: This is what user will see, your game/ application.
- Inspector: Select any item from hierarchy or Project window. You can inspect and edit the property of that item in Inspector window.
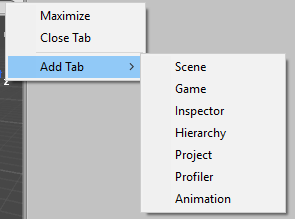
You can add more tabs and adjust layout upon your requirement.
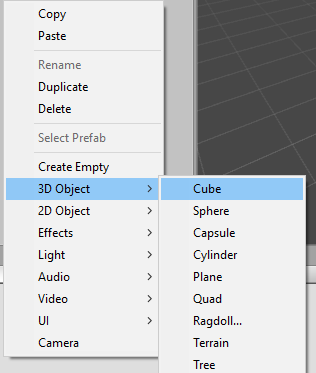
Let’s add a simple game object (3D model) in our scene. Right click in Hierarchy window and add one Cube object in the scene.
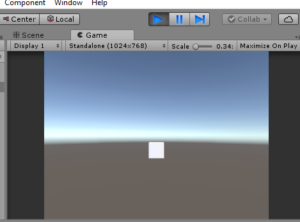
You will be able to see a cube in scene and game window.
Run the application
Click on triangular play button located at top center to play the game.
In this article we discussed about how to get started with unity. In next articles, we will see many other features of unity. Post your comments for queries and feedback. Thanks for reading.
Latest posts by Gyanendu Shekhar (see all)
- Using Transparent Material in Unity 3D - February 8, 2021
- Getting started with UI Toolkit : Unity 3D Tutorial - December 30, 2020
- Using Events in Unity 3D - May 2, 2020
